
이번 글에서는 오토핫키를 통해서 자동으로 입력하고자 하는 내용을 입력하는 방법을 다뤄보도록 한다.
매크로라는게 사실 크게 별거 없다.
매크로는 인공지능 이런게 아니라, 이미 정해져 있는 행동을 반복하는 것이기 때문이다.
사람이 하는 반복적인 행동을 줄여주는 것이 목적이므로,
사람이 주로 하는 작업들을 우선적으로 다루고 있다.
좌표계와 마우스 입력까지 다루었으므로, 이번에는 키보드 입력을 다룰 차례다.
키보드 입력은 제일 쉽다.
키보드 입력 명령어는 Send 이다.
사용 방법도 너무 간단하다.
그냥 Send, keys
- keys 에 누르고 싶은 키보드를 써 넣으면 된다.
예제 코드 아래를 참고하자.
F9::
Send, Hello world
return
오토핫키 편집 프로그램인 SciTE4AutoHotkey 를 열어서
위의 코드를 복붙하고 실행시켜 보자.
그리고 F9 키를 누르면

이렇게 입력이 되는 것을 알 수 있다.
웃긴것은 여기에 한/영 키를 누르고 다시 F9 키를 눌러보면,
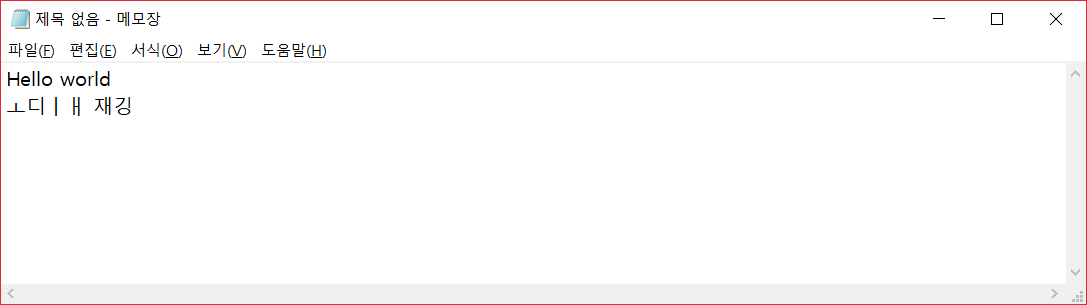
한글로 쳐진다는 것이다.
Send 명령어를 잘 이해해야 하는 것이
Send 다음의 문자열을 출력시키는 것이 아니라
해당 키를 사람이 누르는 것과 똑같이 작동한다는 것이다.
따라서 Send를 사용할 때에는 한/영 전환이 어떻게 되어 있는지 잘 파악하고 사용해야 탈이 없을 것이다.
그리고 보통 한글은 사용 안 한다고 생각하고 코딩하는게 좋다.
물론 한글도 Send 로 보내진다.
한글은 신기하게도 한/영 키에 영향을 받지 않는다.
F9::
Send, 안녕하세요 {Enter}다이버 입니다.
return
이런 코드를 작성했다고 하자.
실행시키면
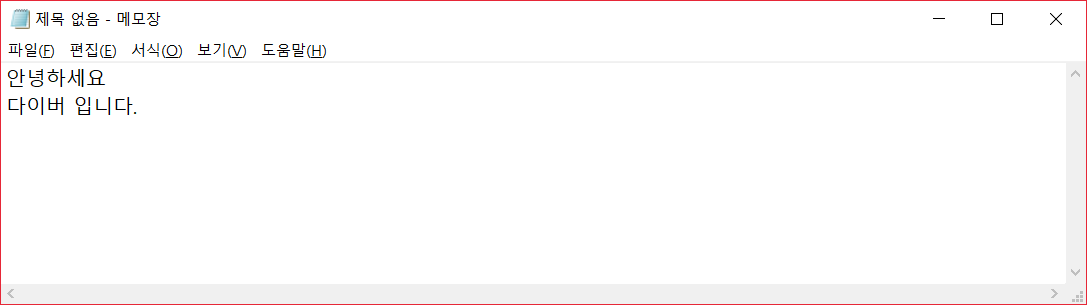
한글로 잘 뜨게 된다.
잘 뜬다 해서 잘 되는게 아니니깐, 권장하지는 않는다는 것이다.
그리고 위의 코드에서 {Enter} 를 사용한 것을 볼 수 있는데,
키보드의 특수키 사용방법 중 하나이다.
키보드에는 특수키가 여러개 있는데, Ctrl, Alt, Enter, Shift, 방향키, Home 등이 있다.
이 내용은 오토핫키 도움말에서 친절하게 설명해주고 있다.
아래 접은 글에서 특수 키들의 사용 방법을 알 수 있다.
Key names
The following table lists the special keys that can be sent (each key name must be enclosed in braces):
| {F1} - {F24} | Function keys. For example: {F12} is the F12 key. |
| {!} | ! |
| {#} | # |
| {+} | + |
| {^} | ^ |
| {{} | { |
| {}} | } |
| {Enter} | Enter key on the main keyboard |
| {Escape} or {Esc} | Escape |
| {Space} | Space (this is only needed for spaces that appear either at the beginning or the end of the string to be sent -- ones in the middle can be literal spaces) |
| {Tab} | Tab |
| {Backspace} or {BS} | Backspace |
| {Delete} or {Del} | Delete |
| {Insert} or {Ins} | Insert |
| {Up} | ↑ (up arrow) key on main keyboard |
| {Down} | ↓ (down arrow) key on main keyboard |
| {Left} | ← (left arrow) key on main keyboard |
| {Right} | → (right arrow) key on main keyboard |
| {Home} | Home key on main keyboard |
| {End} | End key on main keyboard |
| {PgUp} | PageUp key on main keyboard |
| {PgDn} | PageDown key on main keyboard |
| {CapsLock} | CapsLock (using SetCapsLockState is more reliable on Win 2k/XP). Sending {CapsLock} might require SetStoreCapsLockMode Off beforehand. |
| {ScrollLock} | ScrollLock (see also: SetScrollLockState) |
| {NumLock} | NumLock (see also: SetNumLockState) |
| {Control} or {Ctrl} | Control (technical info: sends the neutral virtual key but the left scan code) |
| {LControl} or {LCtrl} | Left Control key (technical info: sends the left virtual key rather than the neutral one) |
| {RControl} or {RCtrl} | Right Control key |
| {Control down} or {Ctrl down} | Holds the Control key down until {Ctrl up} is sent. To hold down the left or right key instead, use {RCtrl down} and {RCtrl up}. |
| {Alt} | Alt (technical info: sends the neutral virtual key but the left scan code) |
| {LAlt} | Left Alt key (technical info: sends the left virtual key rather than the neutral one) |
| {RAlt} | Right Alt key (or AltGr, depending on keyboard layout) |
| {Alt down} | Holds the Alt key down until {Alt up} is sent. To hold down the left or right key instead, use {RAlt down} and {RAlt up}. |
| {Shift} | Shift (technical info: sends the neutral virtual key but the left scan code) |
| {LShift} | Left Shift key (technical info: sends the left virtual key rather than the neutral one) |
| {RShift} | Right Shift key |
| {Shift down} | Holds the Shift key down until {Shift up} is sent. To hold down the left or right key instead, use {RShift down} and {RShift up}. |
| {LWin} | Left Win key |
| {RWin} | Right Win key |
| {LWin down} | Holds the left Win key down until {LWin up} is sent |
| {RWin down} | Holds the right Win key down until {RWin up} is sent |
| {AppsKey} | Menu key (invokes the right-click or context menu) |
| {Sleep} | Sleep key. |
| {ASC nnnnn} |
Sends an Alt+nnnnn keypad combination, which can be used to generate special characters that don't exist on the keyboard. To generate ASCII characters, specify a number between 1 and 255. To generate ANSI characters (standard in most languages), specify a number between 128 and 255, but precede it with a leading zero, e.g. {Asc 0133}. Unicode characters may be generated by specifying a number between 256 and 65535 (without a leading zero). However, this is not supported by all applications. For alternatives, see the section below. |
| {U+nnnn} |
[AHK_L 24+]: Sends a Unicode character where nnnn is the hexadecimal value of the character excluding the 0x prefix. This typically isn't needed in Unicode versions of AutoHotkey, where Send and ControlSend automatically support Unicode text. SendInput() or WM_CHAR is used to send the character and the current Send mode has no effect. Characters sent this way usually do not trigger shortcut keys or hotkeys. |
|
{vkXX} |
Sends a keystroke that has virtual key XX and scan code YYY. For example: Send {vkFFsc159}. If the sc or vk portion is omitted, the most appropriate value is sent in its place. The values for XX and YYY are hexadecimal and can usually be determined from the main window's View->Key history menu item. See also: Special Keys Warning: Combining vk and sc in this manner is valid only with Send. Prior to [v1.1.27], hotkeys permitted but ignored any non-hexadecimal characters following XX. |
| {Numpad0} - {Numpad9} | Numpad digit keys (as seen when NumLock is ON). For example: {Numpad5} is 5. |
| {NumpadDot} | . (numpad period) (as seen when NumLock is ON). |
| {NumpadEnter} | Enter key on keypad |
| {NumpadMult} | * (numpad multiplication) |
| {NumpadDiv} | / (numpad division) |
| {NumpadAdd} | + (numpad addition) |
| {NumpadSub} | - (numpad subtraction) |
| {NumpadDel} | Delete key on keypad (this key and the following Numpad keys are used when NumLock is OFF) |
| {NumpadIns} | Insert key on keypad |
| {NumpadClear} | Clear key on keypad (usually the '5' key when NumLock is OFF). |
| {NumpadUp} | ↑ (up arrow) key on keypad |
| {NumpadDown} | ↓ (down arrow) key on keypad |
| {NumpadLeft} | ← (left arrow) on keypad |
| {NumpadRight} | → (right arrow) key on keypad |
| {NumpadHome} | Home key on keypad |
| {NumpadEnd} | End key on keypad |
| {NumpadPgUp} | PageUp key on keypad |
| {NumpadPgDn} | PageDown key on keypad |
| {Browser_Back} | Select the browser "back" button |
| {Browser_Forward} | Select the browser "forward" button |
| {Browser_Refresh} | Select the browser "refresh" button |
| {Browser_Stop} | Select the browser "stop" button |
| {Browser_Search} | Select the browser "search" button |
| {Browser_Favorites} | Select the browser "favorites" button |
| {Browser_Home} | Launch the browser and go to the home page |
| {Volume_Mute} | Mute/unmute the master volume. Usually equivalent to SoundSet, +1, , mute. |
| {Volume_Down} | Reduce the master volume. Usually equivalent to SoundSet -5. |
| {Volume_Up} | Increase the master volume. Usually equivalent to SoundSet +5. |
| {Media_Next} | Select next track in media player |
| {Media_Prev} | Select previous track in media player |
| {Media_Stop} | Stop media player |
| {Media_Play_Pause} | Play/pause media player |
| {Launch_Mail} | Launch the email application |
| {Launch_Media} | Launch media player |
| {Launch_App1} | Launch user app1 |
| {Launch_App2} | Launch user app2 |
| {PrintScreen} | PrintScreen |
| {CtrlBreak} | Ctrl+Pause |
| {Pause} | Pause |
| {Click [Options]} [v1.0.43+] |
Sends a mouse click using the same options available in the Click command. For example, Send {Click} would click the left mouse button once at the mouse cursor's current position, and Send {Click 100, 200} would click at coordinates 100, 200 (based on CoordMode). To move the mouse without clicking, specify 0 after the coordinates; for example: Send {Click 100, 200, 0}. The delay between mouse clicks is determined by SetMouseDelay (not SetKeyDelay). |
| {WheelDown}, {WheelUp}, {WheelLeft}, {WheelRight}, {LButton}, {RButton}, {MButton}, {XButton1}, {XButton2} |
Sends a mouse button event at the cursor's current position (to have control over position and other options, use {Click} above). The delay between mouse clicks is determined by SetMouseDelay. WheelLeft/Right require [v1.0.48+], but have no effect on operating systems older than Windows Vista. LButton and RButton correspond to the "physical" left and right buttons when used with Send, but the "logical" left and right buttons when used with hotkeys. In other words, if the user has swapped the buttons via system settings, {LButton} performs a logical right click, but a physical left click activates the RButton:: hotkey. Likewise for {RButton} and LButton::. To always perform a logical click, use {Click} instead. |
| {Blind} | Enables the Blind mode, which gives the script more control by disabling a number of things that are normally done automatically to make things generally work as expected. The string {Blind} must occur at the beginning of the string. |
| {Raw} [v1.0.43+] |
Enables the Raw mode, which causes the following characters to be interpreted literally: ^+!#{}. Although the string {Raw} need not occur at the beginning of the string, once specified, it stays in effect for the remainder of the string. |
| {Text} [v1.1.27+] |
Enables the Text mode, which sends a stream of characters rather than keystrokes. Like the Raw mode, the Text mode causes the following characters to be interpreted literally: ^+!#{}. Although the string {Text} need not occur at the beginning of the string, once specified, it stays in effect for the remainder of the string. |
이 내용을 다 알 필요는 없다.
자신이 필요할 때에만 찾아서 적용하면 된다.
도움말의 내용을 더 빌리자면
키를 여러번 반복적으로 누를 수도 있고,
누르고 있는 상태도 유지할 수도 있다.
아래 도움말 내용을 한번 살펴보자.
To repeat a keystroke: Enclose in braces the name of the key followed by the number of times to repeat it. For example:
Send {DEL 4}  ; Presses the Delete key 4 times.
Send {S 30}   ; Sends 30 uppercase S characters.
Send +{TAB 4}  ; Presses Shift-Tab 4 times.
키를 여러번 누르는 설명이 담겨있다.
단순히 Send 다음 누를 키와 횟수를 입력하면 된다.
마지막에 있는 Send+{TAB 4} 의 동작은 Shift 누른채로 TAB을 4번 반복해 누르는 동작이다.
To hold down or release a key: Enclose in braces the name of the key followed by the word Down or Up. For example:
Send {b down}{b up}
Send {TAB down}{TAB up}
Send {Up down}  ; Press down the up-arrow key.
Sleep 1000  ; Keep it down for one second.
Send {Up up}  ; Release the up-arrow key.
위의 설명은 키를 누르고 있는 상태를 유지하는 내용을 담고 있다.
Send 명령어 다음 누를 키와 down 상태를 입력해주면 계속 누르고 있는 상태가 되고,
다시 up 명령을 해주어야 한다.
Loop 20
{
    Send {Tab down}  ; Auto-repeat consists of consecutive down-events (with no up-events).
    Sleep 30  ; The number of milliseconds between keystrokes (or use SetKeyDelay).
}
Send {Tab up}  ; Release the key.
반복문에서 Send {TAB down}을 입력하면
자동으로 눌렀다 뗐다를 반복하게 된다.
마지막에 Send {TAB up}을 해주어야 최종적으로 TAB을 20번 누르고 키를 떼게 된다.
그런데 실제로 테스트해보면 키를 누르고 있는다해서 계속 키입력이 되지 않는다.
그렇다고 위의 코드가 필요 없는게 아닌게, 각종 프로그램에서 단축키를 활용하는 경우 Shift를 누른채로 p를 누르거나 할 때 사용하기도 한다.
키 입력은 이정도로만 알아둬도 충분하다.
이제 마우스입력과 키보드입력을 배웠으므로 조잡하지만 간단한 매크로들은 다 만들 수 있게 되었다.
'코딩 > 오토핫키' 카테고리의 다른 글
| 오토핫키로 화면내 이미지를 찾는 방법 (0) | 2020.10.20 |
|---|---|
| 오토핫키로 카카오톡 실행해서 비밀번호 자동으로 입력하기 (1) | 2020.10.19 |
| 오토핫키로 메세지창, 알림창 띄우기 (0) | 2020.10.18 |
| 오토핫키로 원하는 좌표 클릭하기 (4) | 2020.10.18 |
| 오토핫키 최신버전과 전용 편집기(SciTE4AutoHotkey) 설치하기 (0) | 2020.10.18 |


댓글