
<목표>
- 아두이노를 활용한 프로젝트를 하다보면 무게와 압력을 감지해야 할 때가 있다.
이 때, 사용하는 센서가 로드셀과 HX711 이다.
로드셀은 3선식과 4선식이 있는데,
3선식이 사용하기 매우 까다롭다.
그 3선식 로드셀을 통해 무게를 측정해보도록 하자.
<준비물>
- 아두이노(우노, 나노, 메가), 로드셀(3선식 2개), HX711 (로드셀 앰프)

<회로도>

선이 복잡해 보이겠지만 잘 따라서 보면 이해가 될 것이다.
D/I 는 아두이노의 2번핀
SCK 는 아두이노의 3번핀에 연결해주면 된다.
<코드>

우선 아두이노에서 라이브러리를 추가해주어야 한다.
라이브러리 매니저에서 HX711을 검색하고
"HX711 Arduino Library" 를 설치해준다.
#include "HX711.h"

// HX711 circuit wiring
const int LOADCELL_DOUT_PIN = 2;
const int LOADCELL_SCK_PIN = 3;

HX711 scale;

void setup() {
  Serial.begin(57600);
  scale.begin(LOADCELL_DOUT_PIN, LOADCELL_SCK_PIN);
}

void loop() {

  if (scale.is_ready()) {
    long reading = scale.read();
    Serial.print("HX711 reading: ");
    Serial.println(reading);
  } else {
    Serial.println("HX711 not found.");
  }

  delay(1000);

}
라이브러리가 설치되었다면 위의 코드를 아두이노에 업로드 시켜준다.
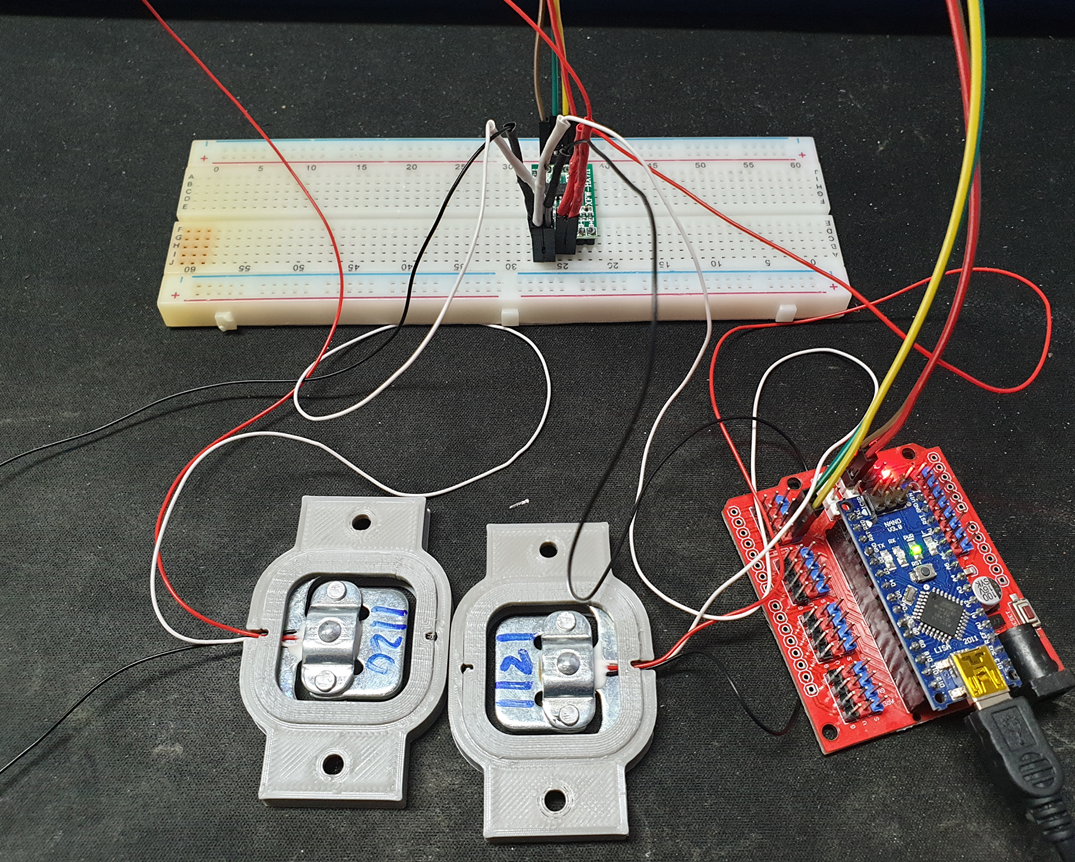
참고로 필자는 로드셀을 정확하게 사용하기 위해서 하우징을 만들어 사용하였다.
하우징에 결합하고 사용해야 정확한 센서값을 얻을 수 있다는 점 참고하시길
<실행 결과>

무부하 상태에서 측정된 센서값이다.
센서가 민감하기 때문에, 값이 수시로 바뀐다.
왼쪽 로드셀을 검지로 눌러주면 수치가 변하게 된다.

무부하 상태가 대략 28만 이었다면,
왼쪽 로드셀에 힘을 가했을때 40만 까지 센서값이 치솟는 것을 확인할 수 있다.
이번에는 양쪽 로드셀을 검지로 눌러보자.
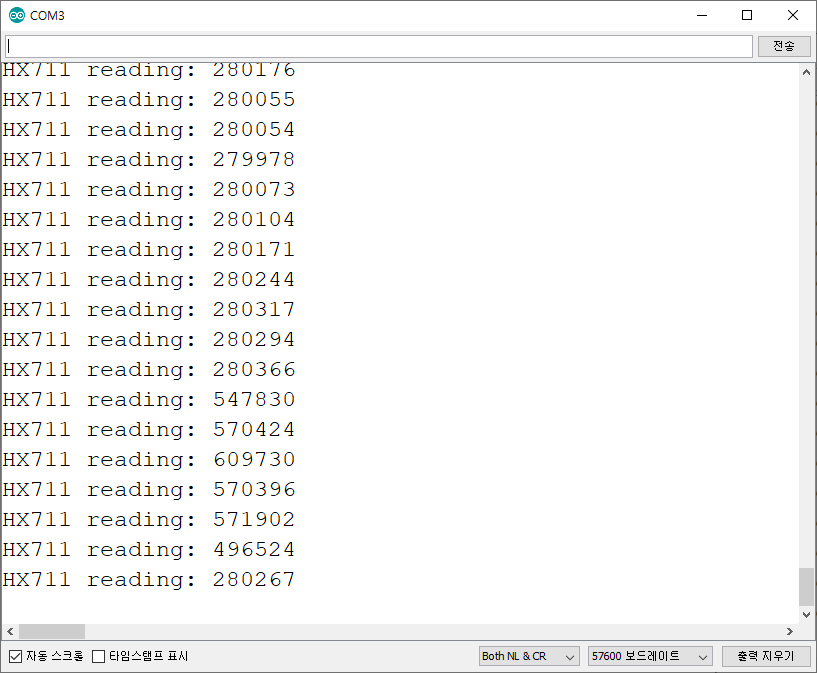
무부하 센서값 28만에서
60만까지 센서값이 치솟는 것을 확인할 수 있었다.
정상적으로 센서가 작동하는 것을 확인 했다면 다음 단계로 넘어가면 된다.
참고로 센서값이 - 값으로 나온다면 빨간선 위치를 서로 바꿔서 껴보면 된다.
A- 와 A+ 를 서로 바꿔주는 것이다.
<코드>
위에서의 작동이 성공적으로 끝났다면,
이제 영점을 잡아보도록 하자.
#include "HX711.h"


// HX711 circuit wiring
const int LOADCELL_DOUT_PIN = 2;
const int LOADCELL_SCK_PIN = 3;


HX711 scale;

void setup() {
  Serial.begin(38400);
  Serial.println("HX711 Demo");

  Serial.println("Initializing the scale");

  // Initialize library with data output pin, clock input pin and gain factor.
  // Channel selection is made by passing the appropriate gain:
  // - With a gain factor of 64 or 128, channel A is selected
  // - With a gain factor of 32, channel B is selected
  // By omitting the gain factor parameter, the library
  // default "128" (Channel A) is used here.
  scale.begin(LOADCELL_DOUT_PIN, LOADCELL_SCK_PIN);

  Serial.println("Before setting up the scale:");
  Serial.print("read: \t\t");
  Serial.println(scale.read());			// print a raw reading from the ADC

  Serial.print("read average: \t\t");
  Serial.println(scale.read_average(20));  	// print the average of 20 readings from the ADC

  Serial.print("get value: \t\t");
  Serial.println(scale.get_value(5));		// print the average of 5 readings from the ADC minus the tare weight (not set yet)

  Serial.print("get units: \t\t");
  Serial.println(scale.get_units(5), 1);	// print the average of 5 readings from the ADC minus tare weight (not set) divided
						// by the SCALE parameter (not set yet)

  scale.set_scale(2280.f);                      // this value is obtained by calibrating the scale with known weights; see the README for details
  scale.tare();				        // reset the scale to 0

  Serial.println("After setting up the scale:");

  Serial.print("read: \t\t");
  Serial.println(scale.read());                 // print a raw reading from the ADC

  Serial.print("read average: \t\t");
  Serial.println(scale.read_average(20));       // print the average of 20 readings from the ADC

  Serial.print("get value: \t\t");
  Serial.println(scale.get_value(5));		// print the average of 5 readings from the ADC minus the tare weight, set with tare()

  Serial.print("get units: \t\t");
  Serial.println(scale.get_units(5), 1);        // print the average of 5 readings from the ADC minus tare weight, divided
						// by the SCALE parameter set with set_scale

  Serial.println("Readings:");
}

void loop() {
  Serial.print("one reading:\t");
  Serial.print(scale.get_units(), 1);
  Serial.print("\t| average:\t");
  Serial.println(scale.get_units(10), 1);

  scale.power_down();			        // put the ADC in sleep mode
  delay(5000);
  scale.power_up();
}
위의 코드를 아두이노에 업로드하고 결과를 살펴보자.
<실행 결과>

초반에 무부하 상태에서의 값을 측정하여 영점을 잡아주는 것을 확인할 수 있다.
그리고 무게가 측정이 되면, 단발성 측정과 10번의 평균값을 출력해주는 것을 확인할 수 있다.

문제는 센서가 민감해서 무부하 상태임에도 계속 수치가 변한다는 것이다.
센서가 민감하기 때문에 어쩔 수 없는 부분이다.
센서 양측에 손으로 힘을 가해보자.
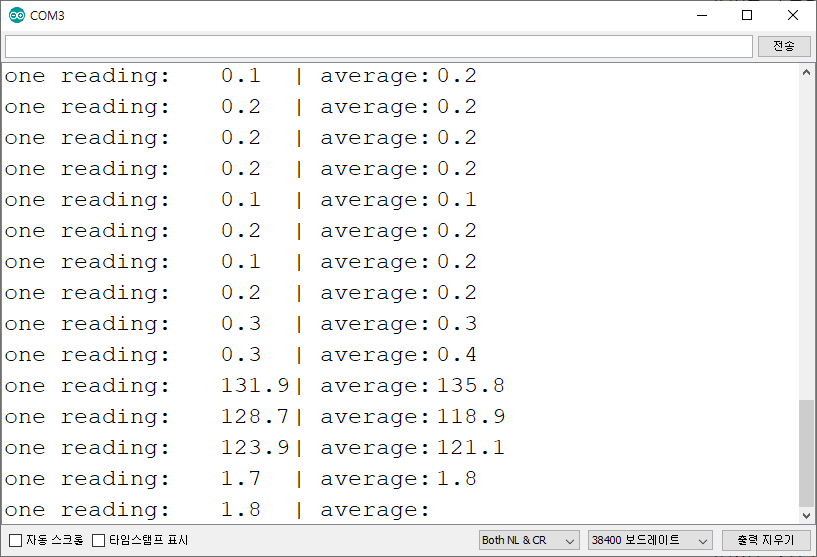
양측에 검지로 힘을 가한 결과 센서값은 약 120 정도의 값이 측정되었다.
여기까지가 영점을 잡아주는 것이었고,
이제는 실제 무게를 측정할 수 있도록 캘리브레이션을 해보자.
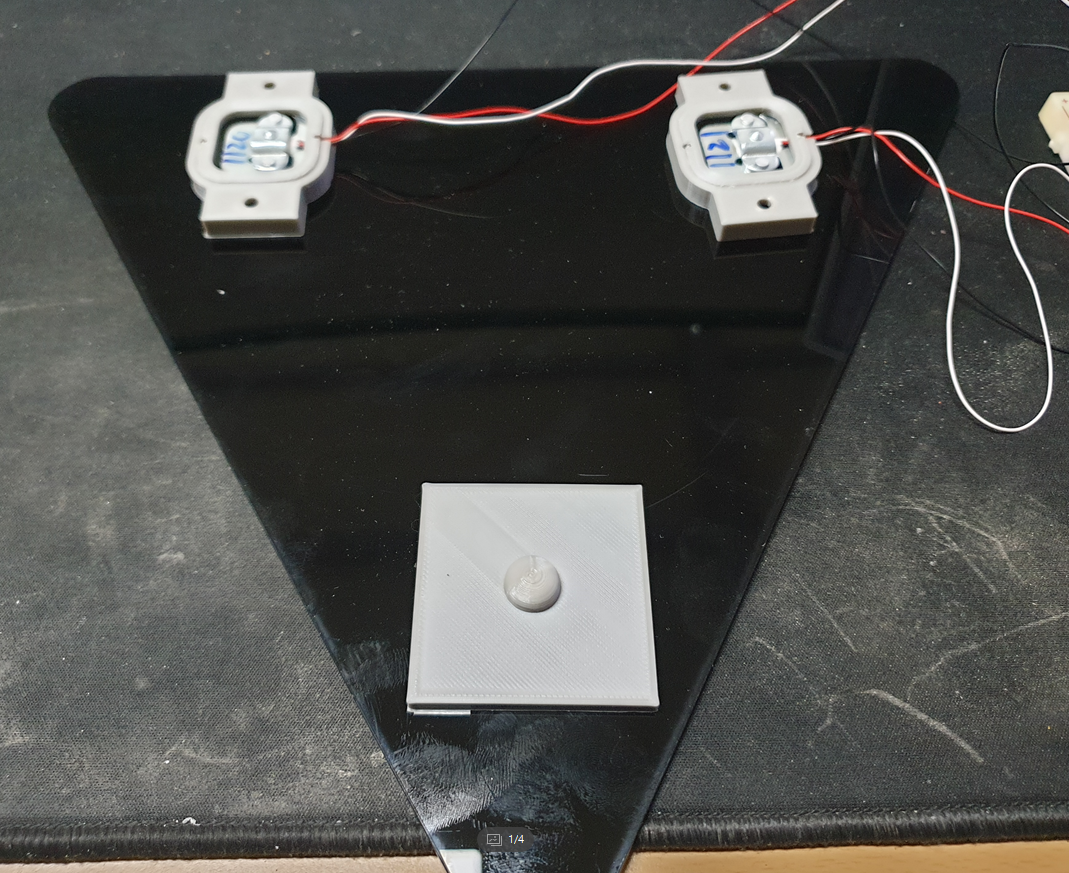
무게를 측정하기 위해서 적어도 3점 지지대를 만들어야 한다.
지지대가 로드셀 두개밖에 없으면 균형을 유지할 수 없기 때문이다.
로드셀을 4개 사용해서 측정하면 좋겠지만, 두개를 사용하고 3점 지지대를 만든 경우
최대한 지지대를 정삼각형이 되게끔 위치시키고
물체를 무게중심점에 위치하게끔 놓아야 한다.
** 실제 무게를 알고있는 물체를 이용해야 한다.
물500ml 또는 2L 생수를 이용해도 좋다.
측정할 수 있는 물체가 많을 수록 좋다.
그래야 식을 만들어서 정확하게 무게 계산식을 만들 수 있기 때문이다.
생수가 여러개면 다양하게 합쳐서 무게를 만들 수도 있다.

물500ml 는 센서값 7.4가 나왔다.

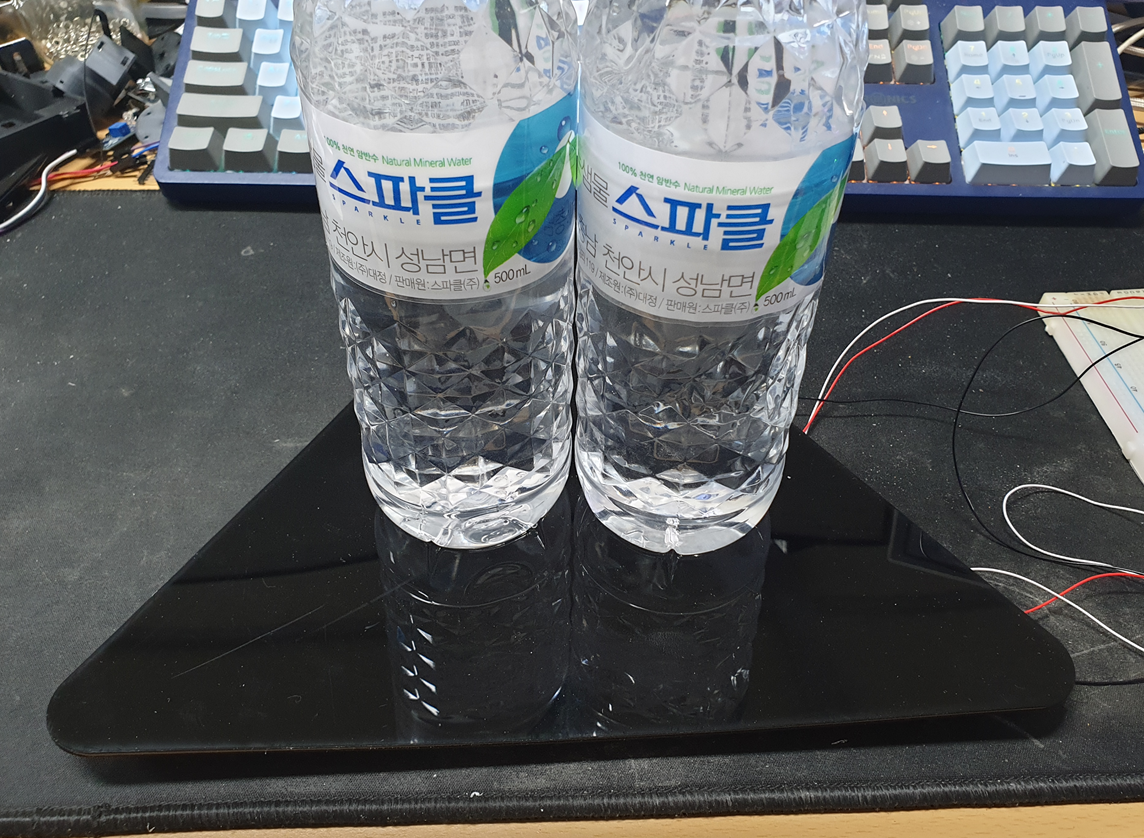
물 1000ml 는 센서값 14.1 이 나왔다.

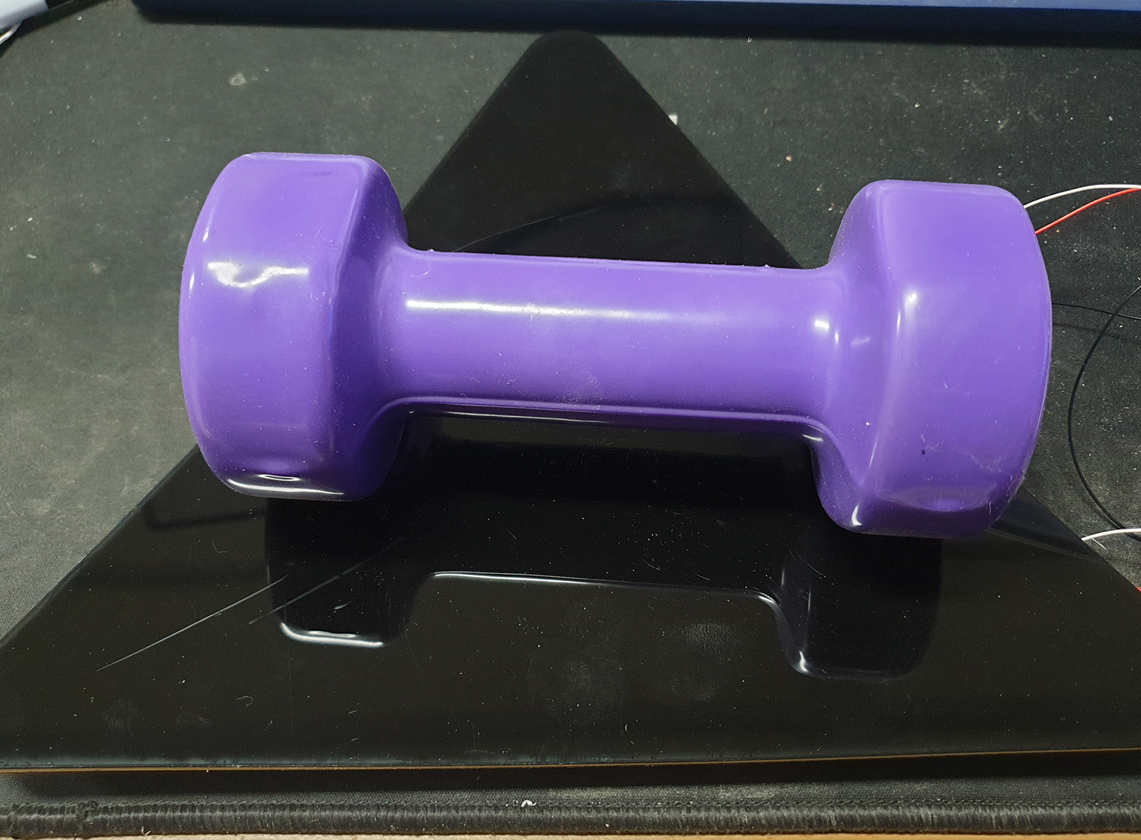
아령 3Kg 은 센서값 29가 나왔다.

이제 위의 데이터를 이용해서 수식을 찾아야 한다.
일단 엑셀을 사용할 수 있어야 한다.
엑셀을 구매하지 않아서 사용하지 못하는 경우에는
구글에서 제공하는 구글시트 (스프레드시트)를 이용해도 된다.

자신이 실측한 무게에 대한 센서값을 셀에 정리하고 차트를 만든다.
차트에서 추세선을 추가하고 다항식 그래프로 나타내준다.
그런 후에 수식을 차트에 표시해주면 된다.

그 수식을 얻었다면 이제 코드에다가 적용시키면 된다.
내가 얻은 수식은
y=0.08*x^3 - 1.17*x^2 + 71.99*x 라고 할 수 있다.
뒤에 나오는 -5E-10 은 -5E^(-10) 과 같고 0과 같기 때문에 무시할 수 있다.
<코드>
#include "HX711.h"


// HX711 circuit wiring
const int LOADCELL_DOUT_PIN = 2;
const int LOADCELL_SCK_PIN = 3;


HX711 scale;

void setup() {
  Serial.begin(38400);
  Serial.println("HX711 Demo");

  Serial.println("Initializing the scale");

  // Initialize library with data output pin, clock input pin and gain factor.
  // Channel selection is made by passing the appropriate gain:
  // - With a gain factor of 64 or 128, channel A is selected
  // - With a gain factor of 32, channel B is selected
  // By omitting the gain factor parameter, the library
  // default "128" (Channel A) is used here.
  scale.begin(LOADCELL_DOUT_PIN, LOADCELL_SCK_PIN);

  Serial.println("Before setting up the scale:");
  Serial.print("read: \t\t");
  Serial.println(scale.read());      // print a raw reading from the ADC

  Serial.print("read average: \t\t");
  Serial.println(scale.read_average(20));   // print the average of 20 readings from the ADC

  Serial.print("get value: \t\t");
  Serial.println(scale.get_value(5));   // print the average of 5 readings from the ADC minus the tare weight (not set yet)

  Serial.print("get units: \t\t");
  Serial.println(scale.get_units(5), 1);  // print the average of 5 readings from the ADC minus tare weight (not set) divided
            // by the SCALE parameter (not set yet)

  scale.set_scale(2280.f);                      // this value is obtained by calibrating the scale with known weights; see the README for details
  scale.tare();               // reset the scale to 0

  Serial.println("After setting up the scale:");

  Serial.print("read: \t\t");
  Serial.println(scale.read());                 // print a raw reading from the ADC

  Serial.print("read average: \t\t");
  Serial.println(scale.read_average(20));       // print the average of 20 readings from the ADC

  Serial.print("get value: \t\t");
  Serial.println(scale.get_value(5));   // print the average of 5 readings from the ADC minus the tare weight, set with tare()

  Serial.print("get units: \t\t");
  Serial.println(scale.get_units(5), 1);        // print the average of 5 readings from the ADC minus tare weight, divided
            // by the SCALE parameter set with set_scale

  Serial.println("Readings:");
}

void loop() {
  Serial.print("one reading:\t");
  Serial.print(scale.get_units(), 1);
  Serial.print("\t| average:\t");
  double x = scale.get_units(10);
  Serial.println(x, 1);

  double weight = 0.08*x*x*x - 1.17*x*x + 71.99*x ;       // 수식 y=0.08*x^3 - 1.17*x^2 + 71.99*x
  Serial.print("Weight : ");
  Serial.print(weight,1);
  Serial.println(" g");


  scale.power_down();             // put the ADC in sleep mode
  delay(5000);
  scale.power_up();
}
위의 코드에서
loop() 내부의 주석으로 " 수식 " 이라고 표시한 곳만 잘 보면 된다.
엑셀에서 구한 수식을 입력해주면 된다.
<실행 결과>

처음 실행했을 때, 영점잡은 상태이다.
센서가 너무 민감하기에 무부하 상태이지만 값이 10g까지 오차가 발생하는 것을 확인할 수 있다.
물 500ml 를 올렸을 때, 무게 측정 결과는 아래와 같다.

캘리브레이션 할 때 측정했던것과 값이 다르긴 하다...
그래도 500~600g 사이로 측정을 잘 해주고 있는 모습니다.
물 500ml 두개를 올렸을 때, 무게 측정 결과는 아래와 같다.

대략 1060g 정도 나오는 것으로 봐선
오차가 +60g 정도 되는 것 같은데
역시 비슷하게 잘 측정해주고 있다.
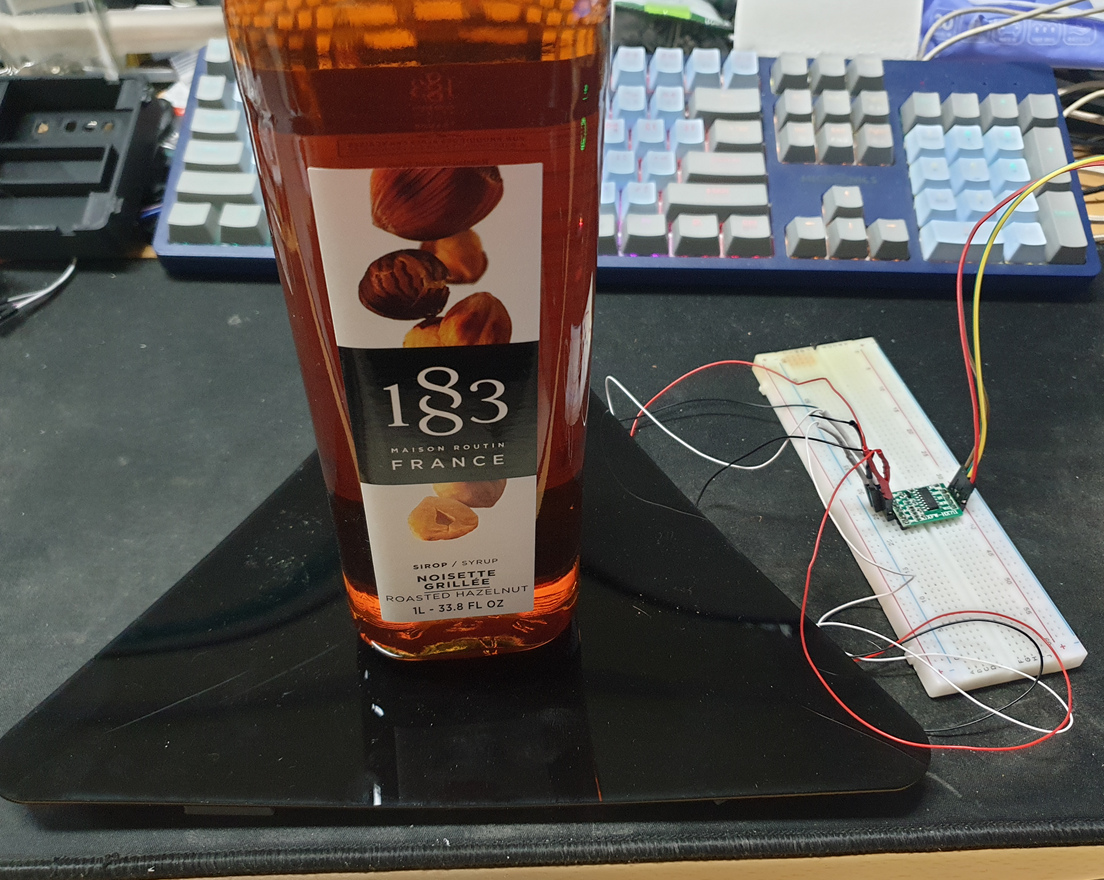
가지고 있는 커피시럽으로 무게를 측정해보았다.

대략 2kg 이라고 하는데, 저울이 없으니 실제 측정은 불가능해서 2kg 근처겠거니 한다.

그래서 실제로 찾아보니 유리병의 경우(측정 제품과 동일)
1.882kg 이라고 한다.
시럽의 경우 오차가 약 200 g 정도 발생했다.
오차가 발생하는 요인은 다양할 것으로 추측된다.
본래 정확하게 무게를 측정하려면
모든 하중은 최종적으로 로드셀에 집중되어져야 한다.
그런데 2개를 사용해서 하프브릿지를 이용한 경우
균형을 잡기위한 최조 지지점 3개에 못미치기 때문에
정확한 측정을 할 수 없다.
다른 지지점 1개에 얼마나 하중이 분산되느냐에 따라서 결과값이 달라질 것이란 뜻이다.
정확한 저울을 사용하기 위해선 무조건 4개의 풀브릿지 회로를 사용해야 할 것이다.
이론상 무게중심점에 정확히 하중점을 위치시키면 되지만,
현실적으로는 불가능 하기 때문에 대략적인 값으로만 사용할 수 있다.
결론.
하프브릿지로는 로드셀 각각에 대한 하중을 측정할 수 있고,
힘 또는 압력을 계산해낼 수 있다.
※ 궁금하시거나 질문사항이 있으시면 댓글로 작성해주시면 답변해 드릴 수 있는 부분에서 친절히 답변드리겠습니다!

'코딩 > 아두이노' 카테고리의 다른 글
| 아두이노 PIR 센서로 사람감지하기 (0) | 2021.04.15 |
|---|---|
| 아두이노 지문인식 센서 사용하는 방법 (0) | 2021.04.15 |
| [SZH-SSBH-002] 적외선 장애물(물체) 감지 센서 사용하는 방법 (2) | 2021.04.01 |
| 아두이노로 DC모터 속도 제어하기 _ PWM이용 (1) | 2021.03.31 |
| 7-segment 4개 모듈 사용하는 방법 TM1637 (0) | 2021.03.30 |


댓글